
So I've finally finished the short demo of the Laser Sheet OSL shader to simulate a laser sheet illuminating the objects in a scene.
In order to use it you must use Cycles, with the OSL option enabled. Add a script node and choose the LaserSheet text file.
You should end um with something like this:
In order to use it you must use Cycles, with the OSL option enabled. Add a script node and choose the LaserSheet text file.
You should end um with something like this:
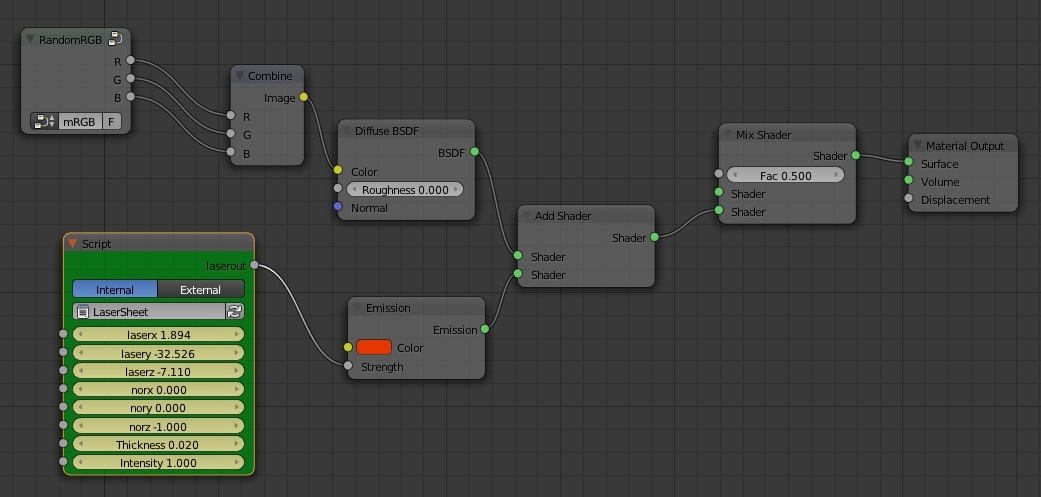
You just have to connect the laserout node to an emmission shader which is then added to the original base shader of the object. In this case I've used the same material for all objects, with a random RGB value node group that I've created some time ago in order to have some variation in the scene.
In the script, we have two inputs for the laser thickness and laser intensity (do not use high values...), 3 inputs for the laser origin, 3 inputs to define the normal to the laser sheet plane. ( 0,0,1) will be a horizontal plane (XY plane), (1,0,0) will be a YZ plane, (0,1,0) will be a XZ plane, but you can use other values).
You can input all these values by hand but in order to create an easier and more visible way of where the plane will be, I've introduced 3 empties in layer 2 which define the origin and the orientation of the laser plane. After placing these as we want, just run the python script "LaserUpdate" and the input values of the OSL script will be updated accordingly (insert then keyframes as needed). You should de-activate layer 2 when rendering since the auxiliary plane will act as an obstacle interfere with the script.
So here's a demo of what can be done with this OSL shader and you can download the .blend file here.
UPDATE! (04.01.2012) - An updated .blend file can be found here with an easier way to define the laser position and orientation from a plane, thanks to SlykDrako who did it using drivers and a python script. The plane might interfere with the laser sheet by creating shadows. Disable layer 2 when rendering if needed.
 RSS Feed
