Here are some images of the talk that me and Rogério Perdiz gave today for more than 200 people. I would like to thank Nuno Cid Martins for the invitation and MrOverclock (forum.blender-pt.com username) for the photos.
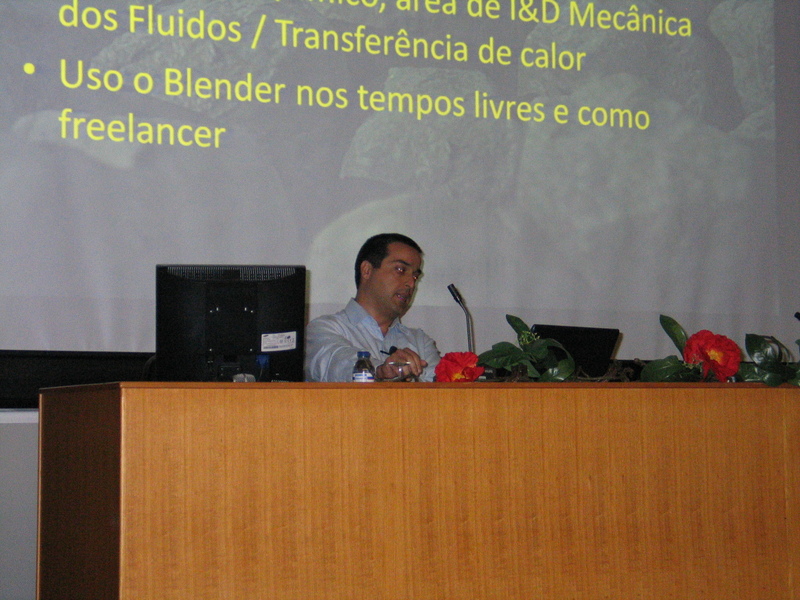
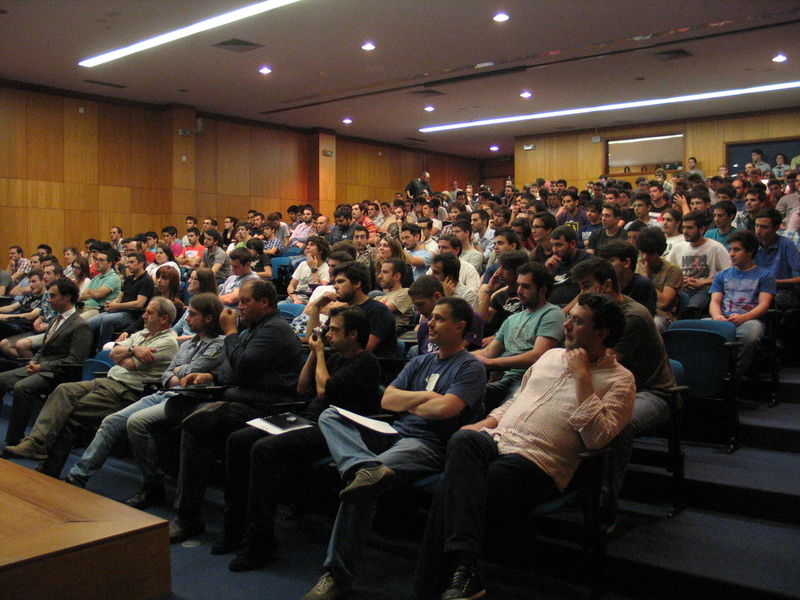
I've been busy these last weeks working with Blender, despite not having many things to post here yet. I'm preparing a promotional video for a company, writing an article for some scientific visualizations and in between I've been today at ISEC in Coimbra to talk about Blender capabilities.
Here are some images of the talk that me and Rogério Perdiz gave today for more than 200 people. I would like to thank Nuno Cid Martins for the invitation and MrOverclock (forum.blender-pt.com username) for the photos.
0 Comments
It's been almost a year since I left in stand-by the animation short movie I'm creating with Blender. I made the animatics then and now it's time to keep developing the final version. For now, I'll start by modeling the main male character from this concept art by a friend, Miguel Melo. I can't guarantee a fast pace on the development of the movie, but I'll try to work on it a little bit every week. This is a work in progress for a project of João Cesário, the author of Aura Mecânica, a b&w comics that he is now managing to convert it to a 3D animation movie. You can follow the development in the facebook page or and in the portuguese blender forum and you can help by modelling some of the missing characters and props. This is my small contribution for the project so far, I've modeled this character, "Robot da construção civil" from his reference drawings. It still needs some touches and the rigging but it's almost done. The final renderings will be in black and white with a technique developed by Paulo Martins. During the Blender PT Conference 2013 that was organized in Oporto in 6-7 April this year, I made a presentation about an article I submitted to show how Python can be used to make repetitive tasks a lot easier. In the example of the article, I wanted to show population statistics of the 308 Portuguese counties for different years, by placing the respective region with a height proportional to the statistical data like in this image. It would be a pain to change all the regions height one by one so I described how to create a python script to read the data from an external file and to change each region height automatically. Additionally I show how to create automatic key frames so that it is easy to animate the data along time and how to create a personalized menu in the Blender interface to make it more user friendly. I deliver now the article and the example files for anyone to explore it, to learn from it and to modify it or improve it if you want. You can download it here. In the following video you can see an example of an animated presentation of population statistical data. These last weeks I've been busy preparing my presentations for the Blender PT Conference 2013. I'll post here the presentations and article soon but apart from that I also prepared this Slot Machine we used to raffle of several prizes during the conference. It was made with BGE and we created a fully functional stand alone executable for the conference. Here I present the .blend file, without the textures and sounds since they could not be re-distributed but you have the references in the .blend file if you want to re-create it like us or you can use your own textures and sounds. You can tell in the .blend file the number of participants and they will be randomly drawn without repetition each time you click on the lever. In the same directory of the .blend file two .json files will be created, one with the list of the numbers still to be drawn and another for backup. You must delete these .json files each time you want to start a new raffle from scratch or if you change the number of participants, otherwise it will use the available list in those files. You can download it here to explore, change it or use it in every way you want, but please credit the authors. Today I introduced another section in this site, dedicated to the Android Apps that I'll be developing. Go and check it out. Tired of complaining about memory issues due to high poly count? No modeling skills? No music/sound skills? Well, you can still use Blender to make animations with this revolutionary technique. Check this animation made in two days using only video sequence editor by animating color effect strips. The sound effects were made with the mouth in a single shot. The Blend file is here for the most curious. Busy times while participating in Mastering Modeling in Blender workshop from Cgcookie.
Here are two modeling exercises done within the workshop. A dog, from a reference image, where the focus was on the mesh topology and a sculpted creature, this one without any reference, just to practice sculpting techniques. No much free time for other Blender things while participating in the Mastering Modeling Blender workshop from CGCookie.
Still 2 weeks to go for tutorials and exercises, before the final project submission, then, back to normal and preparation of the PT Blender Conference. So I've finally finished the short demo of the Laser Sheet OSL shader to simulate a laser sheet illuminating the objects in a scene. In order to use it you must use Cycles, with the OSL option enabled. Add a script node and choose the LaserSheet text file. You should end um with something like this: You just have to connect the laserout node to an emmission shader which is then added to the original base shader of the object. In this case I've used the same material for all objects, with a random RGB value node group that I've created some time ago in order to have some variation in the scene. In the script, we have two inputs for the laser thickness and laser intensity (do not use high values...), 3 inputs for the laser origin, 3 inputs to define the normal to the laser sheet plane. ( 0,0,1) will be a horizontal plane (XY plane), (1,0,0) will be a YZ plane, (0,1,0) will be a XZ plane, but you can use other values). You can input all these values by hand but in order to create an easier and more visible way of where the plane will be, I've introduced 3 empties in layer 2 which define the origin and the orientation of the laser plane. After placing these as we want, just run the python script "LaserUpdate" and the input values of the OSL script will be updated accordingly (insert then keyframes as needed). You should de-activate layer 2 when rendering since the auxiliary plane will act as an obstacle interfere with the script. So here's a demo of what can be done with this OSL shader and you can download the .blend file here. UPDATE! (04.01.2012) - An updated .blend file can be found here with an easier way to define the laser position and orientation from a plane, thanks to SlykDrako who did it using drivers and a python script. The plane might interfere with the laser sheet by creating shadows. Disable layer 2 when rendering if needed. |
AuthorRenato Sousa Blog up to October 2012Archives
August 2016
Categories
All
|